Organisation and GDPR
Storage - export Signed documents to Sharepoint
This feature is deprecated. Use MS Power Automate to export your signed documents to Sharepoint. See the video on how to save signed PDF documents in Sharepoint.
Automatically export your signed documents into a Sharepoint folder, and optionally delete the copy on our system too.
1. Access the organisation-level website
First, go to the organisation-level website (marked ) along the top navigation. 
2. Go to the Data export section
In the organisation website click 'Data Export and Storage' in the left column, then "Add New Sharepoint Storage". 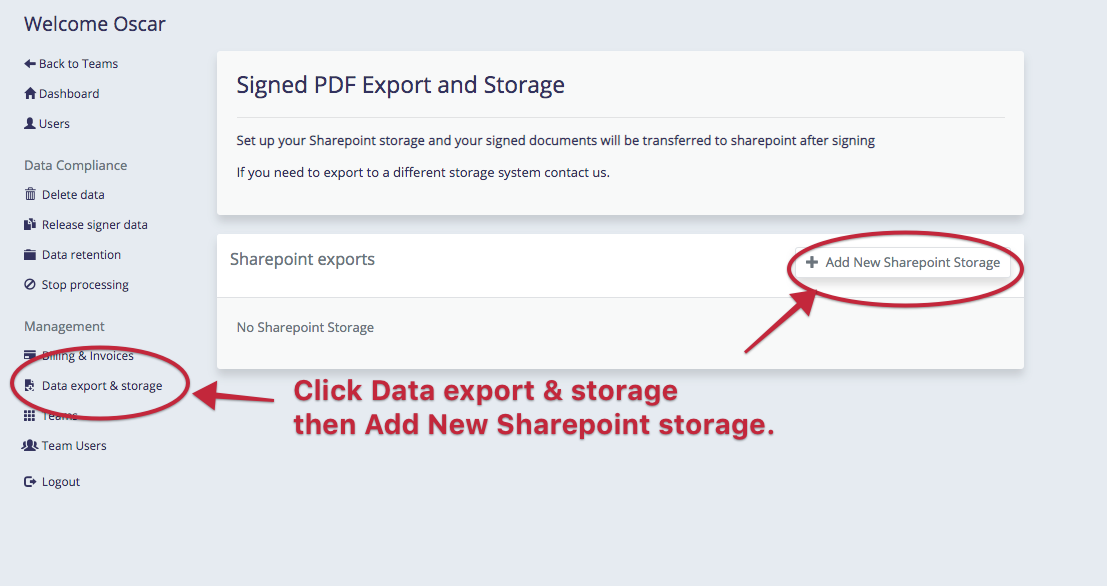 Now you need to fill out your Sharepoint domain and access details, and how you want to name your files. Here is what the form looks like, we will go over each part in more detail below:
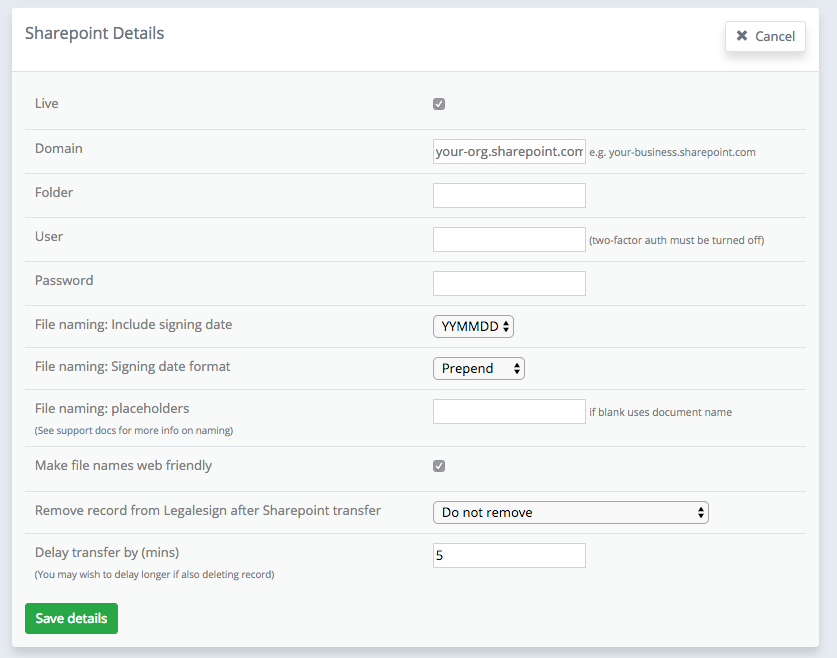
3. Add Sharepoint Domain and Authentication
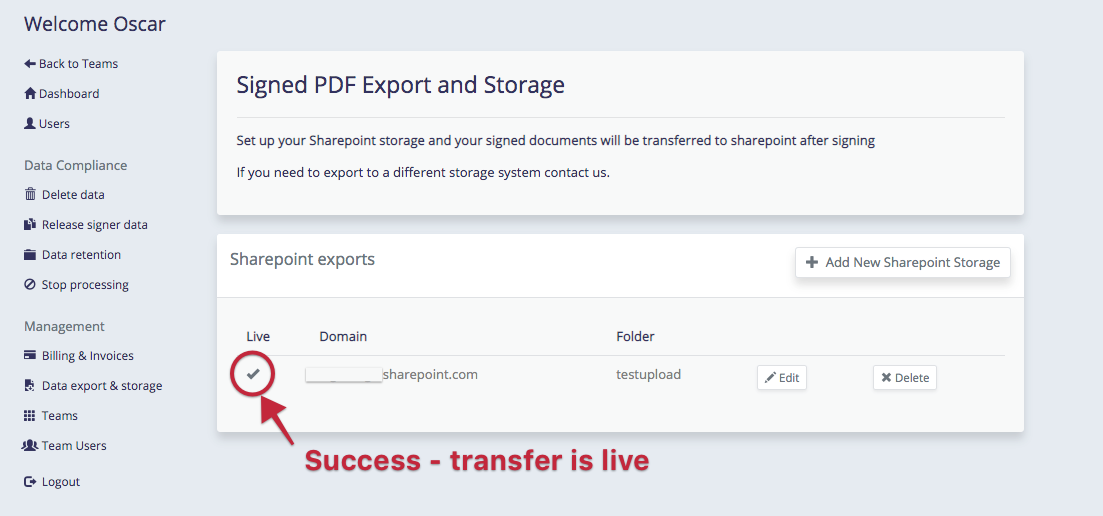
First click "Live" at the top of the form if you want to try and connect immediately. If the connection fails it will still store the details, and you can come back later. Don't forget to click "Live" to test the connection and ensure the transfers begin.
A 'quick and dirty' file export is to copy all your signed document to a dedicated email address - CC copy all signed documents.
You need to add your sharepoint domain name, typically "mybusiness.sharepoint.com", then a user email and password who has access to the relevant sharepoint folder. You need to ensure two-factor auth is turned off for this user.
4. File naming
Use a naming convention for your sharepoint filename so you can find your documents in your sharepoint folder. By default the system will prepend the year,month,date and followed by the document name. But you can replace that by adding keywords to the input "File naming: placeholders".
The keyword options are:
document_name
signer_lastnames
signer_emails
AND, any label of sender fields used in the document
By using these keywords you customise the sharepoint file name to include signer names and/or emails, and value(s) you entered when sending out the document. If you use more than one keyword split the keywords with a comma. For example, you can add a required sender field labelled 'Reference' which is filled out when the document is sent. Add this to the File naming: placeholders input, and that value will go into the filename stored in your Sharepoint.
5. Data retention option
The last section of the form asks you whether your want to delete the file and/or record from our system. If you opt to remove the file and record, this erases almost all of the data, except you still have a record that something was signed at a point.
By default the transfer to Sharepoint occurs 5 minutes after signing. If you opt to delete a file you may wish to extend this if you want users to download the file from the site, or to give signers more time to access the document.
6. Connect and Finish
When you press Save, Legalesign will attempt to connect to your Sharepoint. If if fails the system will tell you - your sharepoint details will still be saved but not 'Live'. If you cannot connect please contact support. If it does connect your Sharepoint folder will now include a text note that the connection occured.
That's it, now all your signed files will be sent over to your own Sharepoint system soon after signing.